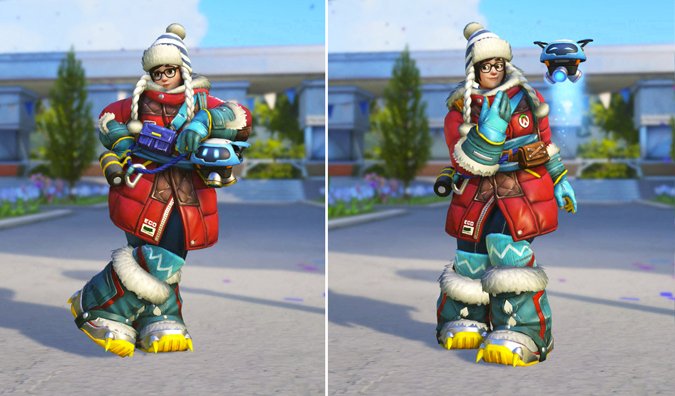
Eco Point Mei Cosplay Work Log | Part I
Hi everyone! I thought it would be fun to document my progress of creating Eco Point Mei, my newest costume, before I debut her at PAX East 2019. This post will be in 3 (or 4) parts: jacket, tank & gun, boots, accessories. Here's part 1!
 PATTERNI’m not good at creating patterns from scratch, so I used Simplicity 1759 as a start. Using wrapping paper with a grid, I traced out the existing pattern into a larger, boxy fit. The grid was key for me to trace out what would become the leather parts, making sure they lined up evenly. I created a mock-up using muslin to make sure my pattern lined up...and it did! I was shocked I didn't have to create it twice. I left plenty of room for seam allowance.FABRICThe jacket has 4 components:
- Fashion Fabric - "wrong side" of red satin (bought 4 yards, had extra)
- Red lining (bought 4 yards, had extra)
- Quilting batting
- Faux leather upholstery fabric - I used leftover from McCree's chaps
 ASSEMBLYTo start, I cut the out all of the main pieces of red fabric, in the fashion fabric, lining, and batting.I laid down all 3 layers of the jacket at once (which in hindsight could have been a mistake, see how messy the inside was below). I sewed together any edges that would be showing; the bottom, and front seams, mostly so the layers would hold together. To “quilt” the pieces, I drew my sections in chalk (I think the squares were 4").
 For the leather pieces, I drew the pattern on the back (diamonds instead of squares) and sewed them using a light tan color thread for contrast. To attach the pieces to the red fabric, I folded down each edge and carefully sewed it down.The sleeves followed the same process as the jacket, except on one arm I added an overwatch patch and painted on "ECOPOINT". The sleeves were a pain in the butt to attach...too many layers! D:
 HOODThe hood is a completely separate entity and isn't attached to the jacket. There's no batting in this; just a thick interfacing to give the hood some structure. I actually used my Shinoa hood as a template for this pattern. The fur was then hand-stitched on.
 The last component was the zipper; I used a 26" separating zipper, though it's really more for show since Mei's jacket is kind of folded over and held in place with a belt.Let me know if you have any specific questions about this! Part 2 will be coming shortly...I just have to finish the props first! :)
