Cosplay | Princess Peach (Amiibo Dress)

Kyla Is Inspired | Princess Peach Cosplay

Kyla Is Inspired | Princess Peach Cosplay

Kyla Is Inspired | Princess Peach Cosplay
Kyla Is Inspired | Princess Peach Cosplay

Kyla Is Inspired | Princess Peach Cosplay
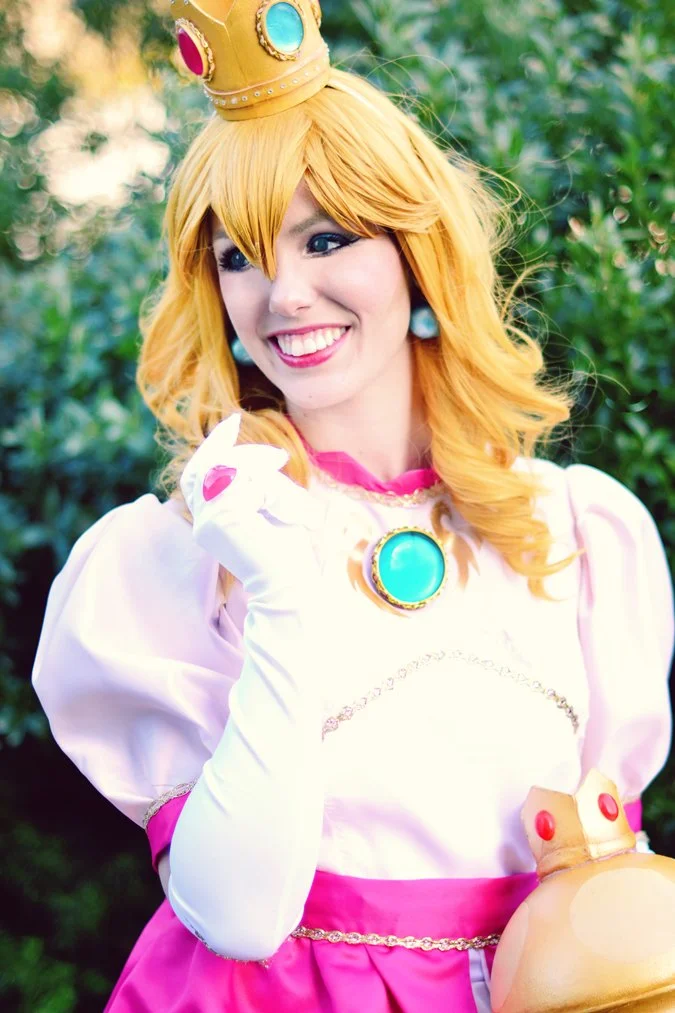
I'm so excited to share with you my latest costume, Princess Peach! I made her Amiibo dress for PAX East 2016. I actually made a different Peach for last year's PAX - but I cut it short into a cocktail dress because my skills just weren't there yet.If you told me a year ago that I would be able to create her gorgeous ball gown, I wouldn't have believed you. That just goes to show that the more you practice and create, the better you'll get! I need to remember this little fact a lot more in life.Click under the cut for a full walkthrough (with photos!) on how I made this costume:
Costume Details

Kyla Is Inspired | Princess Peach Cosplay

Kyla Is Inspired | Princess Peach Cosplay
Kyla Is Inspired | Princess Peach Cosplay

Kyla Is Inspired | Princess Peach Cosplay

Kyla Is Inspired | Princess Peach Cosplay
UNDERSKIRT: I bought 7 layers of dark pink casa collection fabric at Jo-Ann’s, and used my favorite gown pattern, Simplicity 1728. Other than having a ton of fabric this is a basic skirt with a back zip and waistband.
DRESS: I used a bodice pattern that I knew already worked for my body shape and had panels where I could modify, Simplicity 1873. To be sure this would work with the modifications I had in mind, I sewed the lining first to get the shapes right. On the outer fabric pieces I “sliced” the middle part into a point at the bust, and replaced that bottom section with white fabric:Then I sewed the lining to the outer fabric at the top and turned inside out. Since the skirt attached to the bottom of the bodice, and since the edges were getting a zipper, I didn’t bother to turn those edges inside out.
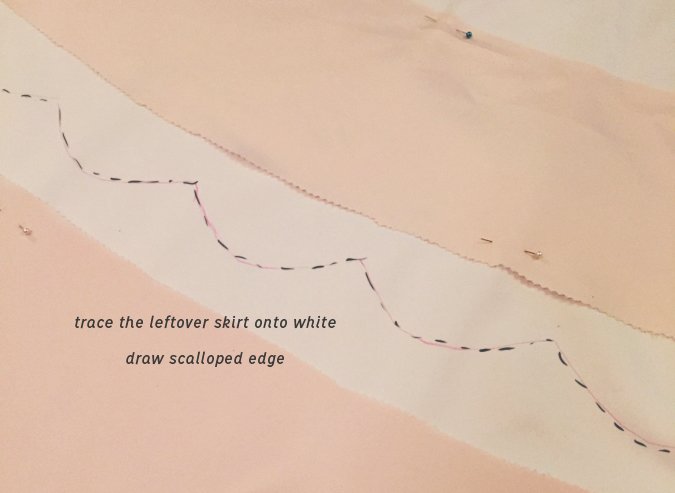
For the skirt of the dress (and the puff sleeves), I again used Simplicity 1728. Once the skirt was done, I cut about 8 inches off since I knew there would be a white, scalloped edge. I then traced those cut pieces onto the white fabric so I knew I’d follow the curve exactly, and added in a scalloped edge. The white was 2 layers, so I sewed around the bottom, turned inside out, pressed, and attached to the bottom of the skirt.
OVERSKIRT: Since there wasn’t a pattern for the skirt, I made my own by making a mini pattern first & then transferring it to a large size. Making minis really helps!To make the gold pattern, I took photos of my Peach amiibo and traced over them in illustrator. I measured the overskirt and sized accordingly (if you’re interested in the pattern, let me know and I can upload it!) Then, I took some gold fabric and attached Heat N’ Bond to the wrong side and traced each shape onto the backing. Then, it’s just cutting the shapes out and ironing them to the skirt. The process is tedious but relatively easy if you’ve used Heat N’ Bond before.Since there’s a back zip in my dress, this overskirt attaches using snaps.
DARK PINK OVERSKIRT: I made this for my Peach last year; I'm sorry, I can't remember exactly how I made it!! All I know is that it's two half circles, lined, pleated into a waistband, which snaps in place in the back.
PETTICOAT: I wore 2, both from ebay; a three-hoop skirt and a tulle skirt with 1 hoop on the bottom.
CROWN & PIN: Crown was made previously from my costume last year, but you can see a tutorial on how I made a similar crown here. The pin is a simple resin cast, which I made a tutorial on here.
GLOVES: Found on Amazon.
WIG: I bought a Hestia from Epic Cosplay in Golden Blonde. I styled the bangs to a point and opted for a softer sweep of the bangs instead of the severe spikes Peach usually sports.
This was kind of a dream costume for me to make and I love the way it turned out. It was about 2 months of work, spread out.If you use any of these tips for one of your costumes, I'd love to see!!