
Cosplay Tutorial | Mario Mushroom
Hello hello! From my last post of Fashion Wario, you may have noticed I was holding a golden mushroom...here, I'll break down the steps involved in making your own, just in time for Halloween! I've even included a downloadable template to print and use!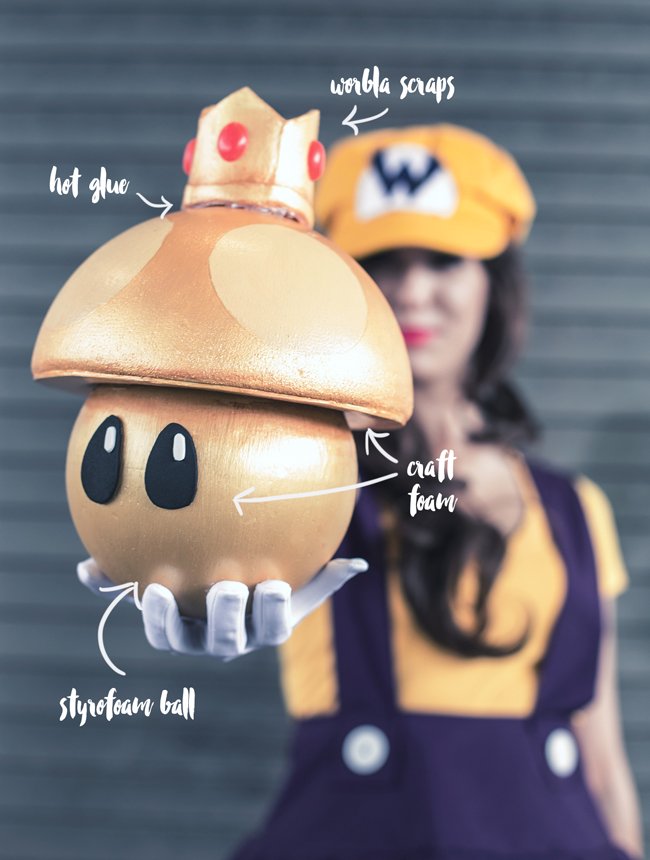
You will need:
- 1 Styrofoam ball
- 1 Styrofoam half circle
- 2 sheets of craft foam
- Fine sandpaper
- Primer
- Gold paint
- Hot glue
Directions
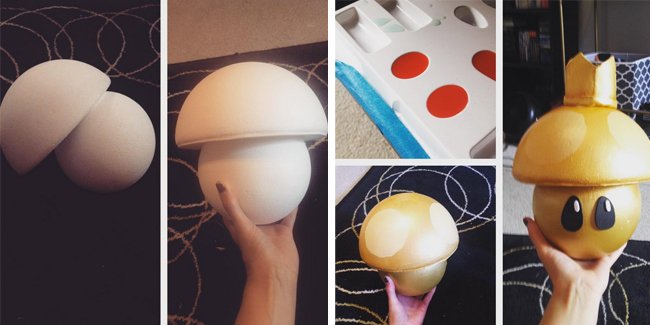
- Line up your styrofoam circle inside the half-circle. You’ll need to cut a circle of craft foam the glue to the half-circle, leaving a hole in the middle. You should be able to “slip” on the top onto the mushroom. Glue in place. (This was honestly a lot of guessing for me to figure out where his mushroom head should hit!)
- Sand everything smooth! I also sanded the bottom to be slightly flat so he could stand up.
- Prime. You can use gesso if you’d like (to fill in any holes), but remember to sand again after
- Paint. I used a few different gold colors for each portion of the mushroom. Feel free to do classic white and red!
- Seal your mushroom with a few layers of mod-podge
- Glue on some craft foam eyes, and you’re done!
 If you want to do the crown, follow the below instructions. It’s the same method I used for my Princess Peach crown!
- Crown template (download here!!)
- 1 sheet craft foam
- Worbla scraps
- Heat gun
- Paint
- Resin kit OR buy your own gems
Directions
- Print out the provided crown template, and cut out of both craft foam and worbla.
- Using your heat gun, heat the SHINY side of the worbla. Place the craft foam on top, and bend the edges of worbla over the foam, encasing it. Do this to all 4 pieces(For tips on using worbla, check out this video!)
- Re-heat all the pieces, and stick the sides together. Shape the crown into a circular shape. Let cool
- If you’d like, add a rectangular strip around the bottom of craft foam.
- Prime. You can use gesso if you’d like (to fill in any holes), but remember to sand again after
- Paint.
- Seal your mushroom with a few layers of mod-podge
Between waiting for paint to dry and putting everything together, I'd say this project took about 5 hours to complete. If you make your own mushroom, I'd love to see how it turned out!